Overview
Bookings let clients self-schedule appointments through your public booking page at{your-slug}.every.ai/book. You choose which services are bookable, set availability and payment requirements, then share the link. Clients pick a service, choose a time, enter their details, pay if required, and receive confirmation automatically.
Open Bookings
View and manage all your bookings in Every
How It Works
For you:- Create the services you want to offer online
- Configure booking settings, availability, and payment behavior
- Share your booking link:
{your-slug}.every.ai/book
- Visit your booking page and select a service
- Pick an available date and time in their local timezone
- Fill in their details
- Pay if required, or skip payment for free/schedule-later bookings
- Receive confirmation email with a calendar export
/book is the current public booking path. Older /booking links still redirect for compatibility.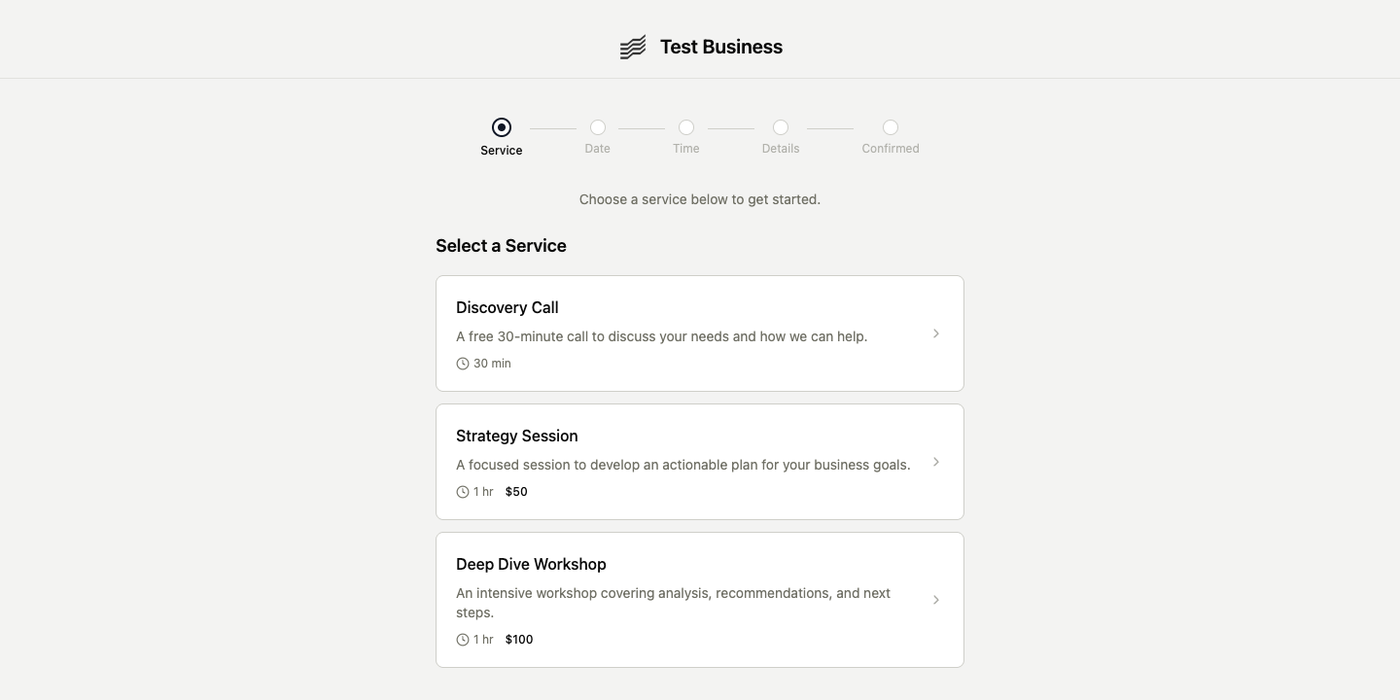
Booking Modes
Every published service uses one of three booking modes:| Mode | How It Works | Best For |
|---|---|---|
| Standard | Client picks a date and time and completes payment behavior you configured | Paid consultations, fixed sessions, structured appointments |
| Free | Client picks a date and time with no payment step | Discovery calls, introductions, free consults |
| Schedule Later | Client submits a request and you schedule the final time afterward | Custom engagements that need coordination |
Booking behavior is configured per service in Booking Settings. Different services can use different modes.
Payment Options
For paid services, you can choose when payment happens:| Payment Timing | Description |
|---|---|
| No payment | No charge collected |
| Pay at booking | Client pays immediately through Stripe Checkout |
| Pay before service | Client’s card is collected at booking and charged automatically before the appointment |
Payment collection requires a connected Stripe account. Set up Stripe in Settings → Payments first.
Configuring Your Booking Page
Go to Booking Settings to configure your booking page.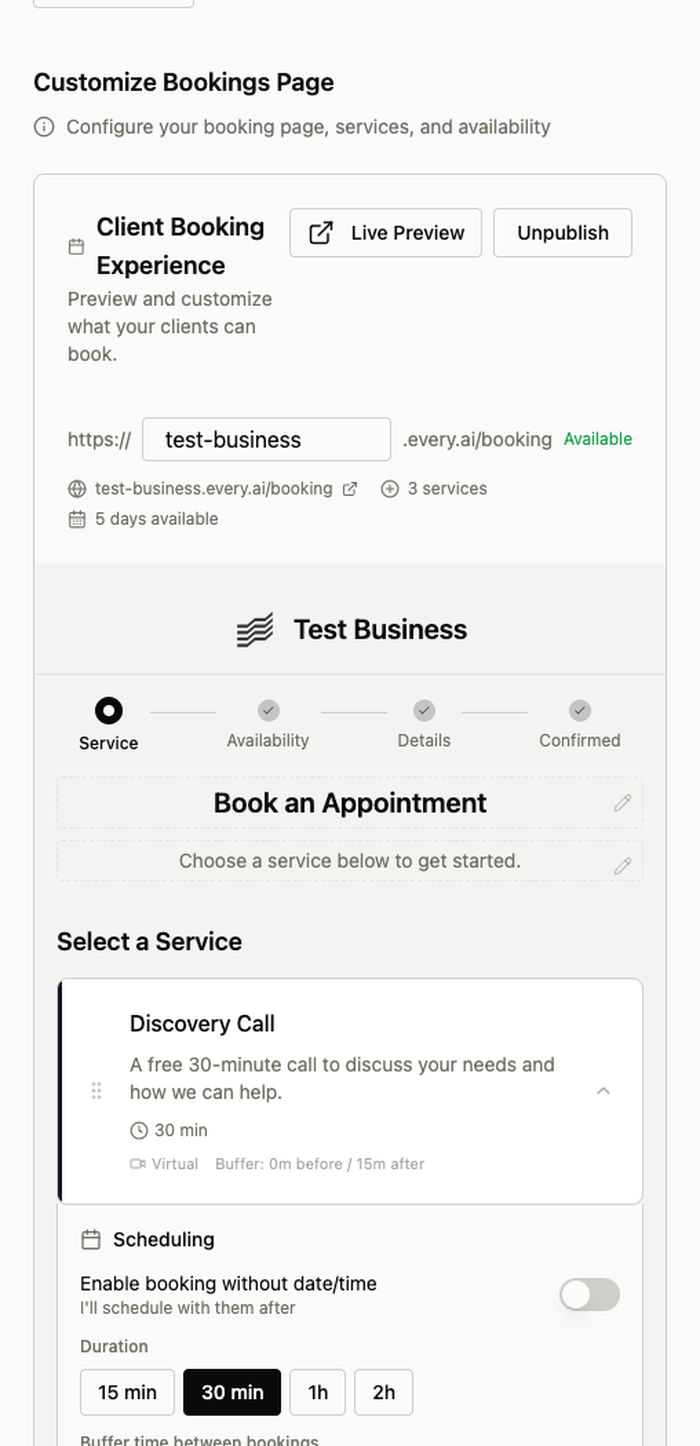
Selecting Bookable Services
Your booking page uses your existing Services. In booking settings, select which services should appear on your public booking page. Each one can have its own booking mode, payment behavior, and configuration.Availability Schedule
Set your weekly availability with day-of-week and time ranges, for example Monday to Friday from 9:00 AM to 5:00 PM. You configure availability in your timezone and clients see those times converted automatically. Use date-specific overrides to block holidays or add special availability on specific days.Google Calendar Integration
Connect Google Calendar to:- Block busy slots so unavailable times do not appear
- Create calendar events automatically when bookings are confirmed
Booking Policy
Add a booking policy using the rich text editor. This appears on your public booking page and can include cancellation terms, preparation instructions, or anything else clients should know before booking.Managing Bookings
Go to Bookings to view all bookings.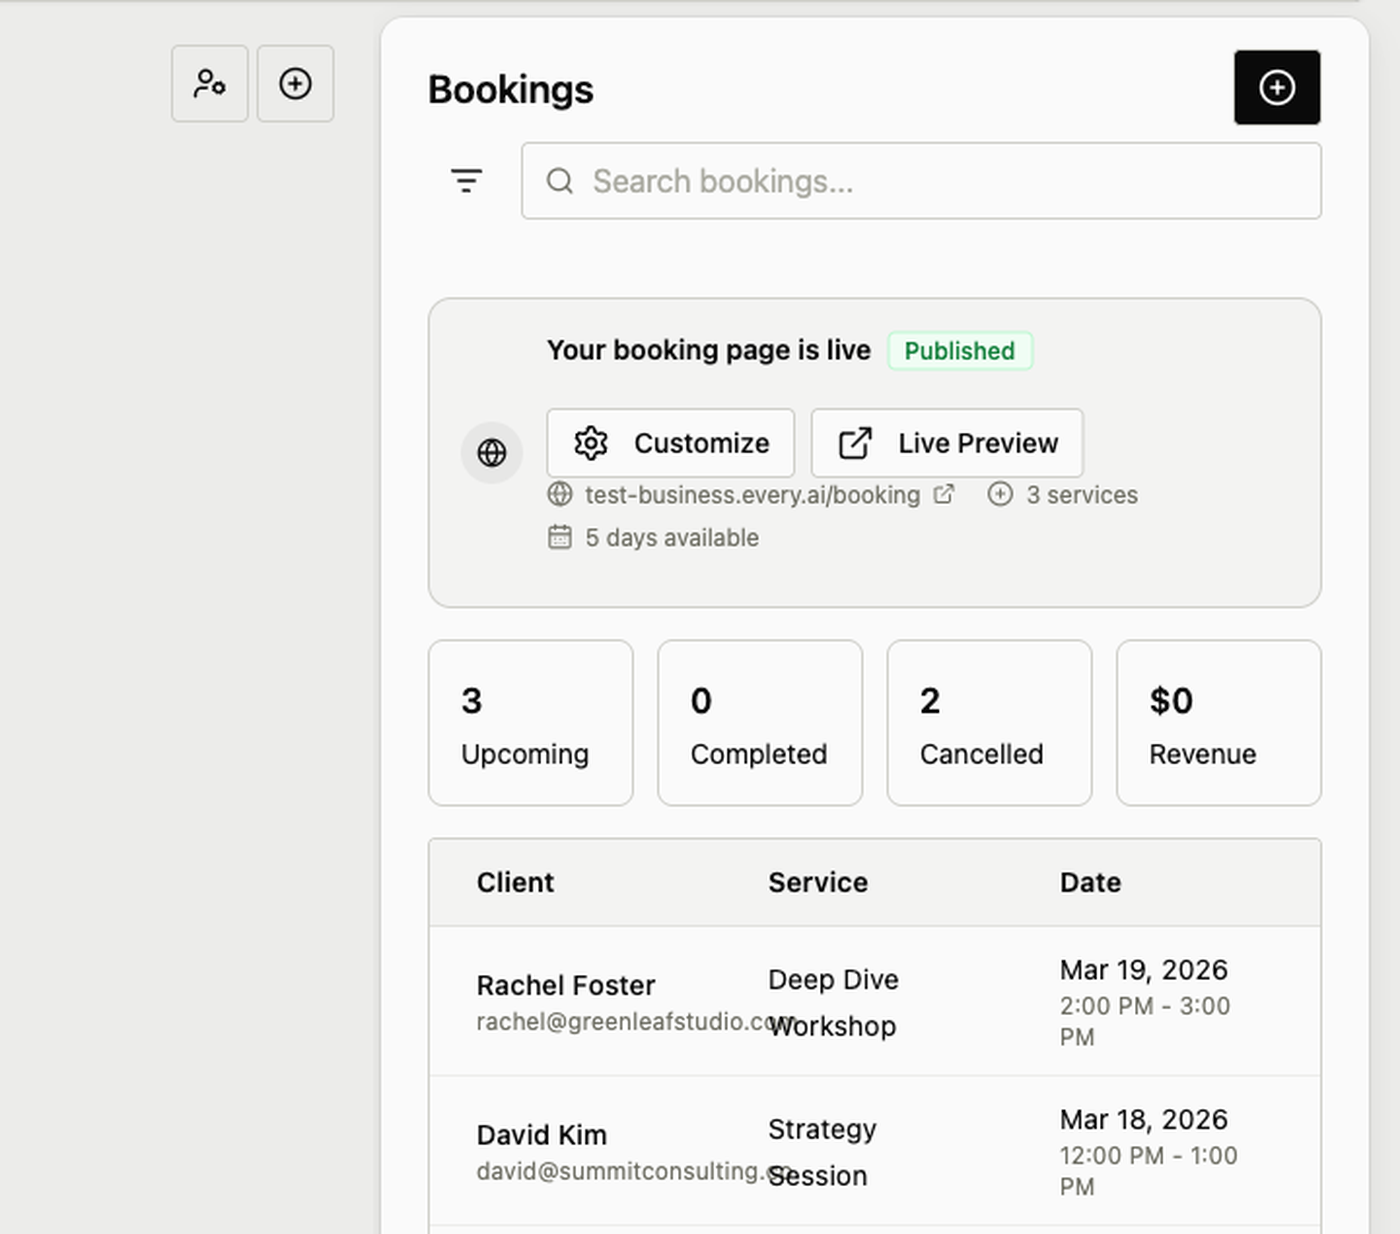
Automated Emails
Every sends automated emails throughout the booking lifecycle:| When It’s Sent | |
|---|---|
| Confirmation | Immediately after booking is created |
| 24-hour reminder | 24 hours before the appointment |
| 1-hour reminder | 1 hour before the appointment |
| Cancellation | When a booking is cancelled |
| Reschedule | When a booking is moved to a new time |
These emails work automatically and go to the email address the client entered during booking.
Public Manage Page
Clients can cancel or reschedule their own bookings through a secure link included in confirmation and reminder emails. No login is required for that booking-specific manage flow. Clients can:- View booking details
- Cancel the booking
- Reschedule to a new available time
- Export the appointment to their calendar
Integration with Your Data
Bookings connect directly with the rest of Every: Services: Your booking page pulls from your existing services, so pricing and descriptions stay consistent. Contacts & Clients: When someone books for the first time, Every automatically creates a contact and client record. Returning clients are matched to existing records when possible. Invoices: When a client pays during booking, Every automatically creates a paid invoice linked to the booking. Client Portal: If you use a branded subdomain, booking can live alongside your invoice, proposal, and client portal experience.Best Practices
Common Workflows
Paid Consultation: Configure service with Standard mode and Pay at booking → Share link → Client books and pays → Confirmation sent → Calendar event created → Reminders go out automatically Free Discovery Call: Configure service with Free mode → Share link → Client books → Confirmation sent → Meet with client → Follow up with a proposal or invoice Custom Engagement: Configure service with Schedule Later mode → Client requests booking → You confirm a final time → Client receives confirmation → Reminders go out automaticallyTroubleshooting
Clients do not see available times: Check weekly availability, date overrides, and whether Google Calendar is blocking all open slots. Payment is not collected: Verify Stripe is connected and the selected service is configured with payment enabled. Client did not receive confirmation: Verify the email address entered during booking and have them check spam/junk folders. Calendar event not created: Reconnect Google Calendar and verify calendar event creation is enabled.Next Steps
Set Up Services
Create the services you want to make bookable
Connect Stripe
Accept payments when clients book
Connect Google
Sync calendar availability and create events
Client Portal
Use branded public links across bookings, invoices, and proposals
Need help? Contact support at hello@every.ai